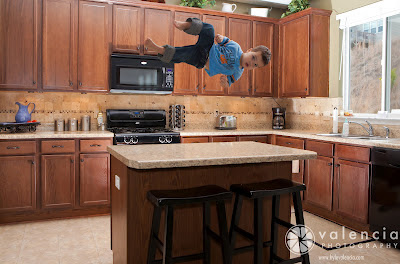
Have you ever see those Photoshopped images in advertisement or on other blogs and thought “how did they do that?” Well, other day I blogged “My kid learned to fly!” and today I am going to show you step by step how to make this happen. Its simple!
What you will need:
A tripod
A camera
Photoshop
A little knowledge of Photoshop. (not too much)
Added bonus of things on hand:
A off camera light and triggering system
An on camera flash/speedlight
First you need to take a shot that will act as your background. Make sure that when you get your camera in place on the tripod that you don’t move the tripod or camera positioning AT ALL until you have taken all the shots you will need for the this project. Here was my background shot that I brought into Photoshop.
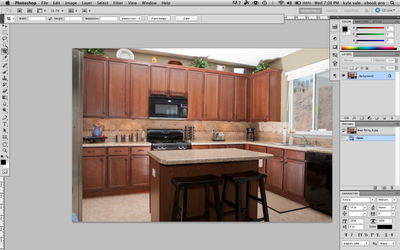
You might be able to tell that I have an off camera strobe laying on the ground behind the Island. I put it at ½ power shooting at the ceiling. This will brighten up the room as the light bounces off the white ceiling and onto the kitchen appliances and later on onto my subject. There were some undeliverable shadows created by this strobe, but I was able to fix them later in the process. I had an on camera flash at 1/8 power for some fill light. My camera settings, which stayed the same throughout the shoot, were F9, 1/30, ISO at 320, and my white balance set to “flash”.
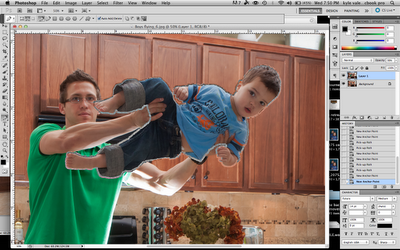
Next I took the picture of my subject. For this project it was my son, Maddox. I did this by holding him up in the air while my wife took some various poses. Try to make sure your hands and and other limbs are not too much in the way. Below is the shot I ended up using and importing into Photoshop ON TOP OF my background.
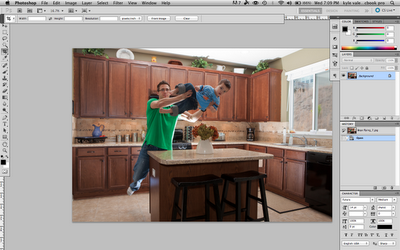
Next is the time consuming part. I took the “pen tool” in Photoshop, zoomed into the subject I wanted to “fly”, and start making anchor points around your subject. Trying to make the anchor points as close to the subject as possible. You are trying to outline your subject in order to “bring it out of the image”. The more detailed you are in this the better your results will be.
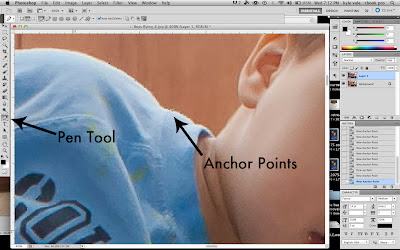
Once you get around your entire subject, simply connect the last anchor point with the first one making a complete selection. It will look like this.

Now right click and choose “Make selection…”, make your “Feather radius” 0, and click OK. Then go to “Layer”, “New”, and then select “Layer via copy”
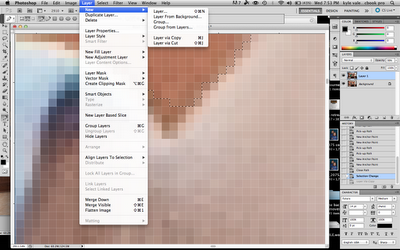
This will bring your image “out” of the background and into a new layer. Now all you have to do is delete the layer with you holding your subject and you should have a flying subject.
You can move your subject around the background by selecting it and using the “move” tool.
I had to do some more processing in Photoshop to get rid of my hands holding Maddox. I am not going to go into the details of that in this tutorial though.
Other ideas:
You can set your background image and then have your subject jump in various ways to make them look like they are flying.
You can throw objects into the frame while taking a photo of them “flying”
You can have your subject stand on a stool and then erase the stool in Photoshop.
Comment with any questions, your thoughts, and other tutorials you might like to see.
Like us on Facebook: Valencia Photography
Check out the website: www.KyleValencia.com
